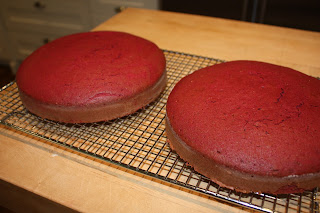
I woke up and baked the cakes early in the morning so they would cool off in order to decorate. I made two recipes of the cream cheese frosting because I read the piped roses would use a lot of frosting….did they ever. I ended up making 3 and a half recipes and only just had enough!

I baked two layers instead of three and made cupcakes with the remaining batter. First things first, you need to level the cakes out in order to stack them together.
It's a bit heartbreaking cutting off and discarding all your hard work but at least you get to taste test it! Level off the tops of the two cakes using a serrated knife. Tip: keep the knife at a 90 degree angle to have an even cake top. Ice one side with a thick later of the frosting then stack the cakes together, flipping one over so the top layer is even.
The next step is very important - the crumb coat!

Cover the entire cake with a thin layer of the frosting. This will be the "background" for the roses
I had to work quickly because the frosting was melting with the humidity! I'm sure you will be neater than I was!

I started off practicing the piped roses on a cupcake. This one wasn't so great but I finally got the hang of it. I followed a blog to learn how to go about making the flowers but it really is simple: Take any medium to large star piping tip and make simply wrap the frosting two times around a centre point. I suggest practising first - even on your counter top! You can always scoop it up and put it back in the piping bag.
A rose!
Begin by wrapping the entire sides of the cake with roses - don't worry about the spaces - you will fill them later!
 Next: move to the top! I suggest working quickly - cream cheese frosting melts quickly as your hands warm up the piping bag. I even turned off the lights to minimize the melting.
To fill in the spaces, follow the direction of the rose next to the space and make an extra "petal" around the rose. At first, it will look a big strange (you can see a not so good example here) but once the entire cake is filled you will be more than pleased.
 |
I know this method seems daunting and difficult but it was simple and successful! Try out one rose on your next frosted baked good - you'll be glad you did! www.wilton.com has some great tips on decorating cakes. Check this out to learn more about properly holding a piping bag.


i can totally tell the difference between the first and second cake -- its great that its so easy to fix little mistakes on cakes, looks amazing!! wish i had a slice right now.
ReplyDelete